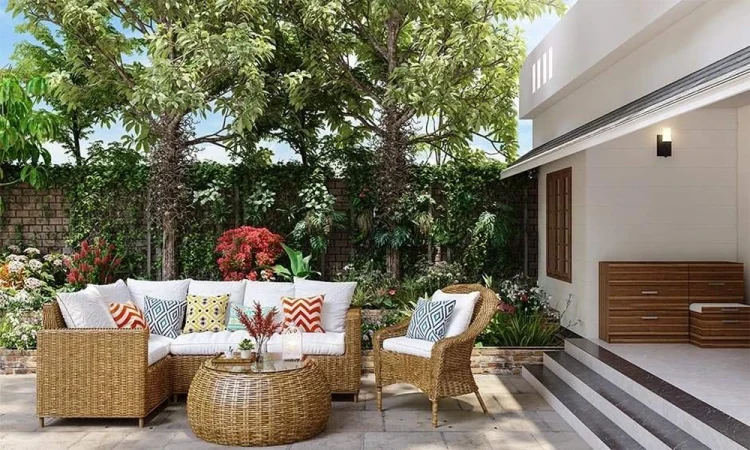
Most backyard makeovers fail before the first shovel hits the ground. Not because of budget. Not because of bad taste. Because the homeowner started shopping for furniture before they figured out how the space actually needs to function. A backyard outdoor living room is not a patio with a chair on it. It is a purposeful extension of your home, and it deserves the same design thinking you would give any room inside.
The good news: you do not need an architect or a massive lot. You need a clear sequence, the right anchors, and a few structural decisions made early that make everything else fall into place. Here is how to get there.
Start With the Zone-First Method
Before you pick a single piece of furniture or a single material, map your zones. This is the single most important step most homeowners skip, and skipping it is exactly why so many backyards end up feeling like a furniture showroom rather than a real room.
The Zone-First Method works like this: walk your backyard and assign each area one primary purpose before anything is bought or built. You are looking for three to five zones maximum. More than five and the space fragments; fewer than two and it gets boring fast. Good zones to consider:
- Lounge zone (seating, conversation, relaxation)
- Dining zone (table, chairs, proximity to the kitchen)
- Activity zone (fire pit, game space, garden bed)
- Transition zone (the path that connects the house to the yard without dead space)
Once zones are mapped on paper or with chalk on the concrete, you can size each one accurately. A lounge zone needs at least a 10-by-12-foot footprint to feel generous. A dining zone for six people needs at minimum a 12-by-14-foot clear area. Undersizing kills the room feel instantly.
According to the 2026 U.S. Houzz Outdoor Trends Study, 83% of renovated outdoor spaces include a lounge or seating area, making it the single most common element homeowners invest in. That number tells you where most people’s instincts already are. Build the lounge zone first, then layer the other zones around it.
Anchor the Space With a Shade Structure
A true outdoor living room needs a ceiling. Not necessarily a literal ceiling with drywall, but a defined overhead plane that signals “this is a room.” Without it, the space reads as a yard. With it, the space reads as a room that happens to be outside. That shift matters enormously for how people actually use the space day to day.
Your shade structure is the single biggest structural decision in the whole project. Get it wrong and everything else suffers. Get it right and even modest furniture looks intentional. Here is a quick comparison of the most common options:
| Structure Type | Best For | Maintenance Level | Coverage |
|---|---|---|---|
| Insulated Patio Cover | Full-sun climates, year-round use | Very low | Full, solid overhead |
| Louvered Cover | Adjustable light and airflow | Low | Variable, motorized |
| Lattice Cover | Filtered shade, plant training | Low to medium | Partial |
| Flat Pan Cover | Clean, modern aesthetic | Very low | Full, solid overhead |
| Wood Pergola | Traditional look | High (staining, sealing) | Partial |
Think about what really happens in your yard. Picture a July evening in Modesto: 95 degrees at 5 p.m., dropping to a perfect 78 by 7. You want to be outside for dinner, but you cannot get out there until the sun stops hammering the patio. A solid insulated cover or a motorized louvered system is the thing that makes the 5 p.m. slot usable. A lattice cover alone will not do it. This is where a lot of homeowners underestimate their own climate.
If you are in the Central Valley or anywhere with long, intense summers, a fully engineered cover attached to the house is almost always the right call. Companies that specialize in Custom patio covers Modesto CA can match the cover’s pitch, fascia, and finish to your existing roofline so the structure looks like it always belonged there rather than an afterthought bolted on over a weekend.
Choose Materials That Actually Survive Outdoors
Outdoor furniture and materials live a hard life. UV rays, moisture cycles, temperature swings, and the occasional forgotten drink on the armrest all conspire against you. The most common mistake is treating an outdoor living room the same as an interior one and buying pieces designed for the indoors that look similar to outdoor pieces.
For surfaces and structure, lean toward aluminum, powder-coated steel, concrete, and composite decking over raw wood or uncoated metal wherever possible. Raw wood requires re-sealing every one to two years, and most homeowners stop doing it after year one. Composite and aluminum hold their finish for a decade or more with almost no intervention.
For soft goods, look at solution-dyed acrylic fabrics. The dye goes all the way through the fiber rather than sitting on the surface, which means fading takes years instead of one season. Sunbrella is the category leader, but there are solid alternatives at lower price points now.
Flooring matters more than most people account for. Concrete pavers, natural stone, and composite deck tiles all work well. Avoid unsealed concrete alone in climates with freeze-thaw cycles and avoid plain brick if your yard has significant root systems underneath. Both shift badly over time.
“Healthy outdoor living and green spaces help the environment, increase home values, make communities more desirable,” said Britt Wood, CEO of the National Association of Landscape Professionals, in the context of the NAR’s 2023 Remodeling Impact Report on Outdoor Features.
Lighting Is the Feature That Changes Everything
Lighting is where most outdoor living rooms go from good to genuinely great, and it is consistently under-budgeted. The backyard you build during the day is not the same backyard you experience at 9 p.m. If you only light it with one overhead fixture, that is exactly what you will get: a bright center and dark edges, which makes the space feel smaller and less inviting.
Layer three types of light: ambient (overhead, diffuse, sets the general level), task (focused, for cooking, dining, or reading), and accent (low-level, highlights plants, paths, and architecture). String lights handle ambient well and are inexpensive. LED path lights cover accent at low cost. The task lighting for a cooking zone or dining table is where you want to invest in weather-rated fixtures rather than cutting corners.
Smart switches or a simple timer on the ambient string lights mean you actually use the system every night rather than hunting for a switch in the dark and giving up.
The Professional vs. DIY Decision, Made Simple
Some parts of an outdoor living room are genuinely DIY-friendly: furniture arrangement, soft goods, lighting strings, container plants, accent decor. Other parts are not, and misreading the line costs money.
Anything that attaches to the house structurally, runs electricity, involves gas lines, or requires permits falls firmly in the professional category. A cover attached to your roof fascia that fails because of improper flashing will leak into your attic. A patio electrical circuit run without a permit creates real problems at resale. These are not the places to save a few hundred dollars.
Professional involvement in outdoor renovations reached a new peak in 2026, according to the Houzz Outdoor Trends Study, with 71% of homeowners enlisting professional help, up from 65% in 2024. The trend makes sense. Structural work, permitting, and material sourcing are simply faster and more reliable with experienced contractors, and the resale math almost always favors it.
Speaking of resale: 92% of Realtors recommend that sellers improve their curb appeal prior to listing, according to the NAR’s 2023 Remodeling Impact Report: Outdoor Features. A well-designed outdoor room is curb appeal you can see from the back gate, and buyers notice.
A Practical Pre-Build Checklist
Before any contractor comes out or any cart gets loaded on a furniture website, run through this list:
- Zones mapped and sized on paper or in a simple app
- Sun path tracked for at least one full afternoon (note where shade falls and when)
- Structural anchor (shade cover type) decided and contractor quotes gathered
- Electrical needs identified and a licensed electrician consulted if outlets or lighting circuits are needed
- Material selections made with outdoor durability as the first filter, aesthetics second
- Lighting layers planned: ambient, task, and accent all present
- Permit requirements checked with your local building department
Run this list before money moves and you will avoid the two most common outdoor living room mistakes: buying furniture before the structure is decided and realizing you have no outdoor power once everything is in place.
Your backyard already has more potential than it’s showing. The gap between what it is now and what it could be is almost always a planning problem, not a budget one. Map the zones, anchor the space with real shade, choose materials that survive your actual climate, and layer your lighting. Do those four things in that order and you will end up with a space you use every single week, not just on holidays.